Recessed Downlights: Cut-Out, Ceiling Void and Fixing
A recessed downlight lives half inside the ceiling. Whether it works depends on three things you can’t see from below: the hole, the space above it, and how the body holds itself in place.
Three figures that are easy to confuse
Every recessed downlight has three dimensions that matter at installation, and they’re easy to mix up on a quick read of a datasheet. F1, the cut-out, is the hole in the ceiling. F2, the face diameter, is the visible trim that sits on the ceiling surface and covers the cut edge. F3, the body height, is how far the fitting reaches up into the void.
The face is always wider than its cut-out. Read F2 as the hole size and you’ll cut a hole the trim can’t cover. For square or twin-head fittings the same three fields apply, and the opening shape is whatever the model’s own drawing says it is, so check the shape there as well as the size.

The space above decides more than the hole does
A hole that fits perfectly is no use if the body can’t go up into it. Before you approve a model, look above the ceiling: joists, cable trays, ducts, sprinkler pipes and insulation all take space, and a void that looks generous on the architect’s section can be crowded in practice.
F3 is the figure to check against that space, and it should include anything attached to the body. Where the driver is separate, it also has to pass through the cut-out and sit somewhere sensible in the void. Whether a driver is integrated, attached or loose is a per-model detail on the spec sheet.
Insulation deserves its own question. Covering a downlight changes how heat leaves the body, so whether a given model may be covered, and under what conditions, is something to confirm per model and against your local wiring rules.
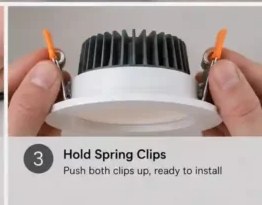
Spring clips and the ceiling board
Many recessed downlights hold themselves in place with spring clips. You fold the clips up against the body, connect the wiring, push the fitting into the hole and let the clips press down onto the back of the ceiling board. It’s quick and needs no tools, but it relies on two things: enough board for the clips to grip and enough clearance above for them to open.
A thin or brittle ceiling, or a hole cut slightly too large, defeats spring clips. On those jobs ask about the fixing method before ordering. It’s listed under F11 alongside recessed or surface mounting. Cut a test hole before the main run.
Which downlight families come recessed
- COB downlights, including twin-head recessed fittings, adjustable-angle versions and anti-glare versions with a deeper-set source.
- SMD integrated and panel downlights, with a flat lit face that suits corridors, offices and bedrooms.
- GU10 and MR16 frames and housings: the frame is recessed and the lamp is separate.
- E27 downlights and bodies, recessed or surface depending on the model.
- Smart WiFi downlights, where the ceiling side is identical to a non-smart recessed downlight.
When surface mounting is the better answer
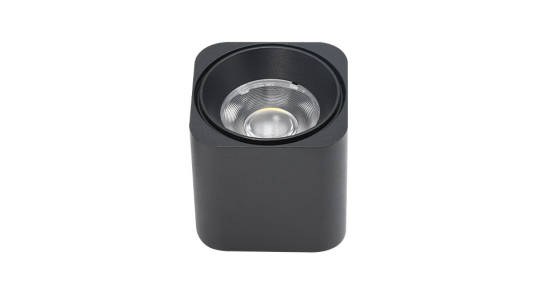
Some ceilings shouldn’t be cut: exposed concrete, very shallow voids, ornamental plaster or a soffit full of services. A surface-mounted downlight sits on the ceiling instead of in it. F1 drops out of the check, and F3 changes meaning: it now tells you how far the body projects below the ceiling, which matters for sight lines and head height.
Recessed and surface versions of a similar look aren’t interchangeable on an order. Mark F11 clearly in your enquiry so we quote the right body.
Let the right thing lead
On a retrofit the hole already exists, so the hole leads and the model follows: measure it, then pick a model whose F1 matches and whose F2 covers any damaged edge. On a new build it’s the other way round. Choose the model first and let its F1 become the instruction for the person cutting the ceiling.
Mixing the two approaches on one project, with some rooms measured and others cut from a drawing, is a common source of site problems. Decide which leads before the first hole is cut.
Send the hole size and the F-codes you need confirmed
We reply with values from the spec sheet of the model that fits your ceiling: cut-out, body height, optics, dimming and warranty, field by field.